Homeowners Maintenance Manual You Can Translate
If you would like to read this Manual in another language please click on “Select Language” in the top right corner of this page. The whole website will translate. To return to English or select another language repeat the process.
Contents
Exterior Walls
Gutters and Downspouts
Roof
Plumbing Essentials
Diagram of Water Supply & Drain System
Diagram of Water Supply & Combined Sewer Drainage System
Water Heaters
Types of Heat
Diagram of Gas Hot Air Heating System
Electrical Sytem
Diagram of Circuit Breaker Box
Diagram of Fuse Box
How To Read an Energy Guide Label
Conserve Energy and Reduce Energy Bills
Maintenance Schedules
Note to Reader: Disclaimer
This document offers general information on maintaining your home and cutting energy costs. Your home is an asset that needs maintenance to preserve its value. Before beginning any home maintenance project, you should plan thoroughly, carefully assessing your own skill level, available tools, and working conditions. Always follow appropriate safety precautions, the manufacturer’s instructions and recommendations for the equipment, and City of Philadelphia codes and regulations. For assistance, we recommend you contact licensed professionals or local home improvement sources. The Start Right Guide from the Department of Licenses and Inspections, which you can find by searching under Publications on the phila.gov website, is a helpful resource.
PHDC is not liable, under any circumstances, for any loss of life, bodily injury, personal injury, property damage including loss of use therefrom, claimed to be as a result of the reader’s use of information contained in this manual.
January 2023
Exterior Walls
Inspect once a year
Pointing
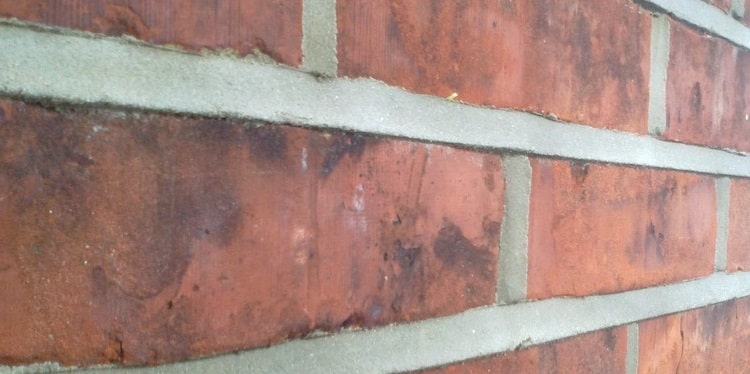 Most exterior walls in Philadelphia are made of brick. The mortar between bricks can deteriorate, loosen and fall out over time. Replacing this mortar is called “pointing.” Pointing is necessary to prevent water from getting between the bricks and into the wall where it can cause more damage.
Pointing should be done by professional masons but inspect your walls once a year for loose, crumbling or missing mortar. Be aware that vines and ivy can loosen mortar.
Keep all exterior wood in good condition
Painting
Paint acts as a barrier to moisture and prevents wood from rotting. Take precautions while doing minor repainting jobs. Children and pets should be kept away from any painting project.
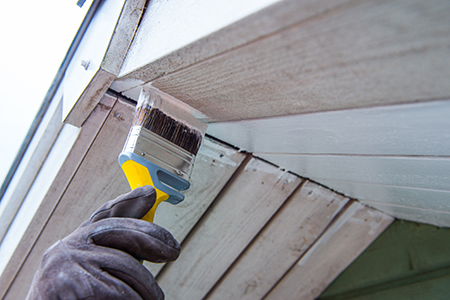
Place a tarp or sheet under the area to be painted. Wet the surface lightly. Scrape loose and peeling paint. Wash the surface to remove dust and particles and after the surface dries, apply primer, which can be purchased at any hardware store. This preparation work will help the paint bond to the wood and lengthen its life expectancy.
There are many different kinds of paint – interior, exterior, wall, ceiling, and door and trim. Use the paint best suited for your job. Read the labels or ask a salesperson for advice.
When you are done, put the paint chips in the trash. Wash your hands, arms, and face thoroughly to remove any paint chips or dust.
If your home needs a large paint job, consider using a professional painter. Many Philadelphia homes still have lead paint, which is toxic if inhaled or eaten. A painting contractor certified in lead paint removal may be necessary if your home still has any layers of paint that were applied before 1978.
For more information about lead safety in your home, visit the Philadelphia Department of Public Health’s Lead and Healthy Homes Program online at www.phila.gov/programs/lead-and-healthy-homes-program/.
Gutters and Downspouts
Clean every fall
Gutters carry water along a horizontal surface (such as the front of a porch roof) to a downspout.
Downspouts carry water down to a drain called a “rain leader” or may flow directly into the yard.
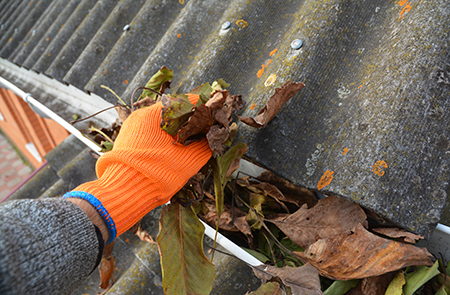
During a rain, walk outside your home to check for leaks and clogs in your gutters and downspouts.
Keep your gutters and downspouts free of clogs, and patch leaks.
Wear work gloves when pulling debris from gutters and downspouts.
Clear any clogs in downspouts with a hose set at full pressure or with a tool called a plumber’s snake (auger).
Repair small gutter leaks. First, remove rust with a wire brush. Next patch holes with gutter caulk.
Roof
Inspect twice a year
Have the roof checked for debris. The roof should be kept clear of leaves, twigs, or any debris that could clog your downspouts.
If you have a flat roof, have it checked for large bubbles or cracks. Have a licensed roofing contractor repair these before they develop into leaks.
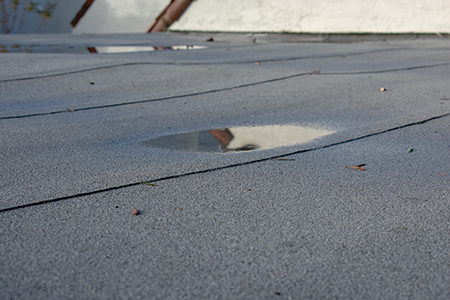
If you have a flat roof, have it coated every 3 – 5 years
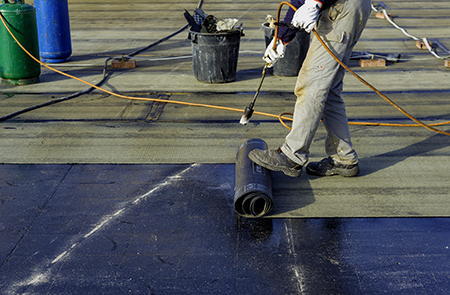
Using a silver coat or a highly reflective white coat is recommended to extend the life of your roof.
If you have a roof warranty, keep it handy and make sure you understand its requirements.
Plumbing
Know your plumbing system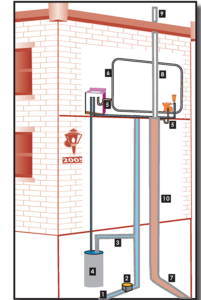
Water Supply and Drain System
The plumbing system in your house is composed of two major systems—the water supply and the drain (sewer line) system. These serve your appliances, your faucets, your toilets and your hot water heater. The diagram at right details these systems:
- Main water supply line
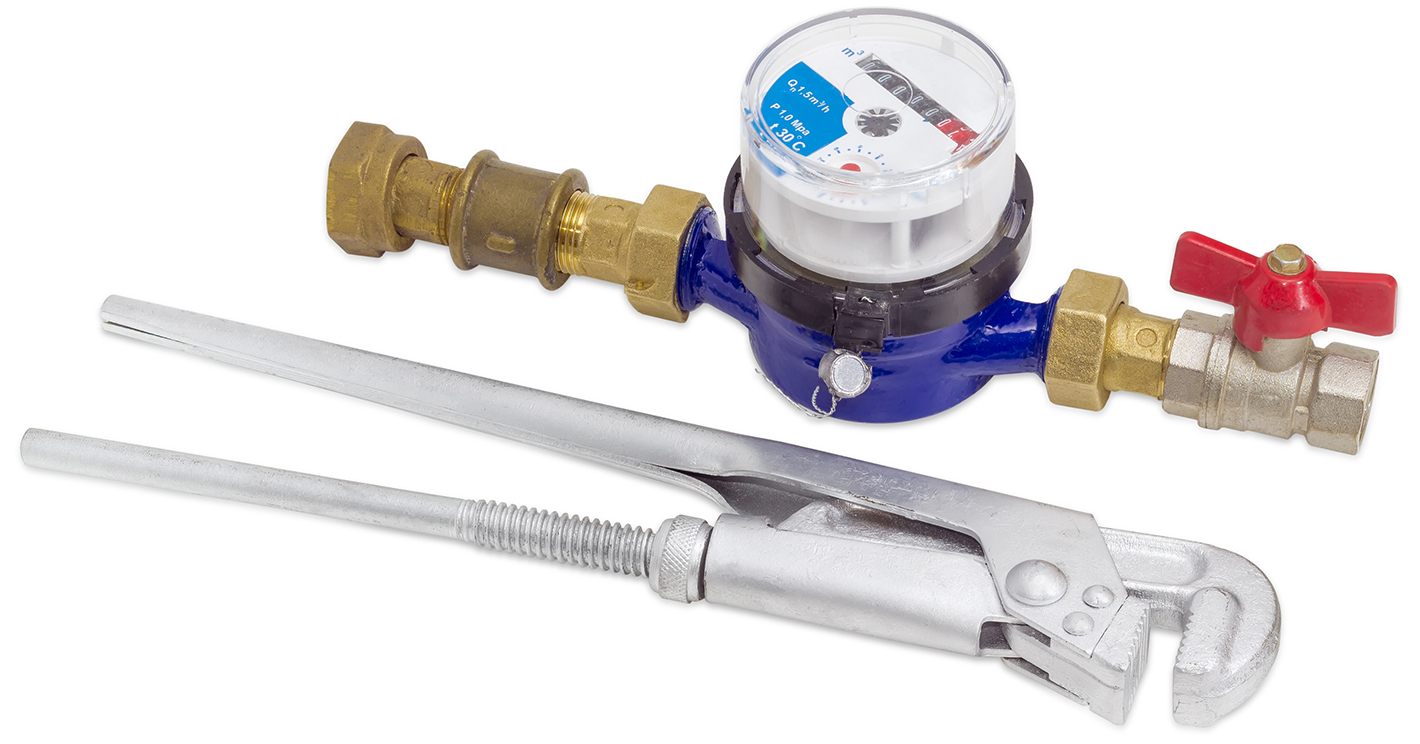
- Water meter (measures how much you use)
- Branch water line to water heater
- Water heater
- Trap – all sinks, baths and toilets have traps
- Vent pipes (air) – critical to allow water flow
- Main drain/soil line
- Vent stack
- Roof vent (air)
- Waste stack
Water Supply and
Combined Sewer Drainage System
1 Ferrule (connects water service to water main)
2 Expansion Loop
3 Water Service
4 Curb Stop
5 Supply Pipe
6 Shut-off Valve
7 Water Meter
8 Curb Stop Box
A Vent Box
B Vent Pipe
C Main Drain Line
D Curb Trap
E Lateral Pipe
F Slant (connects sewer to lateral)
LEAKS AND SHUT-OFFS
Owner’s responsibility
As a homeowner you are responsible for repairs to the water supply and sewer drainage systems for your house. This includes the ferrule (1) and the slant (F). See diagram above.
Stopping the flow of water
Main Water Shut-Off Valve: Located near the water meter. Your water meter is usually in the basement near the front of your home.
Fixture Shut-Off Valves: Many plumbing fixtures have shut-off valves. To shut off water to a fixture (a leaky faucet or an overflowing toilet) turn the shut-off valve clockwise until the water stops, or if a line leaks or breaks, turn off the water to the supply to prevent damage to the home. If the valve is stuck or the fixture doesn’t have a shut-off valve, use the main shut-off valve.
Take winter precautions
- Garden Hoses should be disconnected, drained of water and stored inside until spring.
- Outside Faucets (hose bibs) should be shut off at the inside water fixture shut-off valves. The outside faucets should be left in the open position for the winter. If there are no inside shut-offs, cover the hose bibs with insulated covers.
- Water Pipes: If prolonged, extreme weather is forecast and there are water lines in an unheated area of your home (like under a shed or in a garage), leave the water faucet at the end of those lines dripping slowly. If it’s possible to access these pipes, wrap them with foam pipe insulation. Make sure to cover the pipe elbows. This will reduce the likelihood of freezing. However, if pipes freeze, thaw the pipes slowly using a hair blow dryer. Never use a torch.
Be alert for leaks and clogs
Waste (or “used”) water leaves your home through drains. Sinks, tubs, toilets, yard drains, and most downspouts flow into the main drain inside your home which empties into city sewer lines.
LEAKS
Be alert for signs of drain leaks. Look for water, green crust, or water stains near the drains. If you see signs of a leak, run water through the drain to locate the leak. If there is a hole in the pipe, contact a licensed plumber to replace the pipe. If the leak is at a threaded joint, you may be able to fix the problem by tightening the nut.
CLOGS
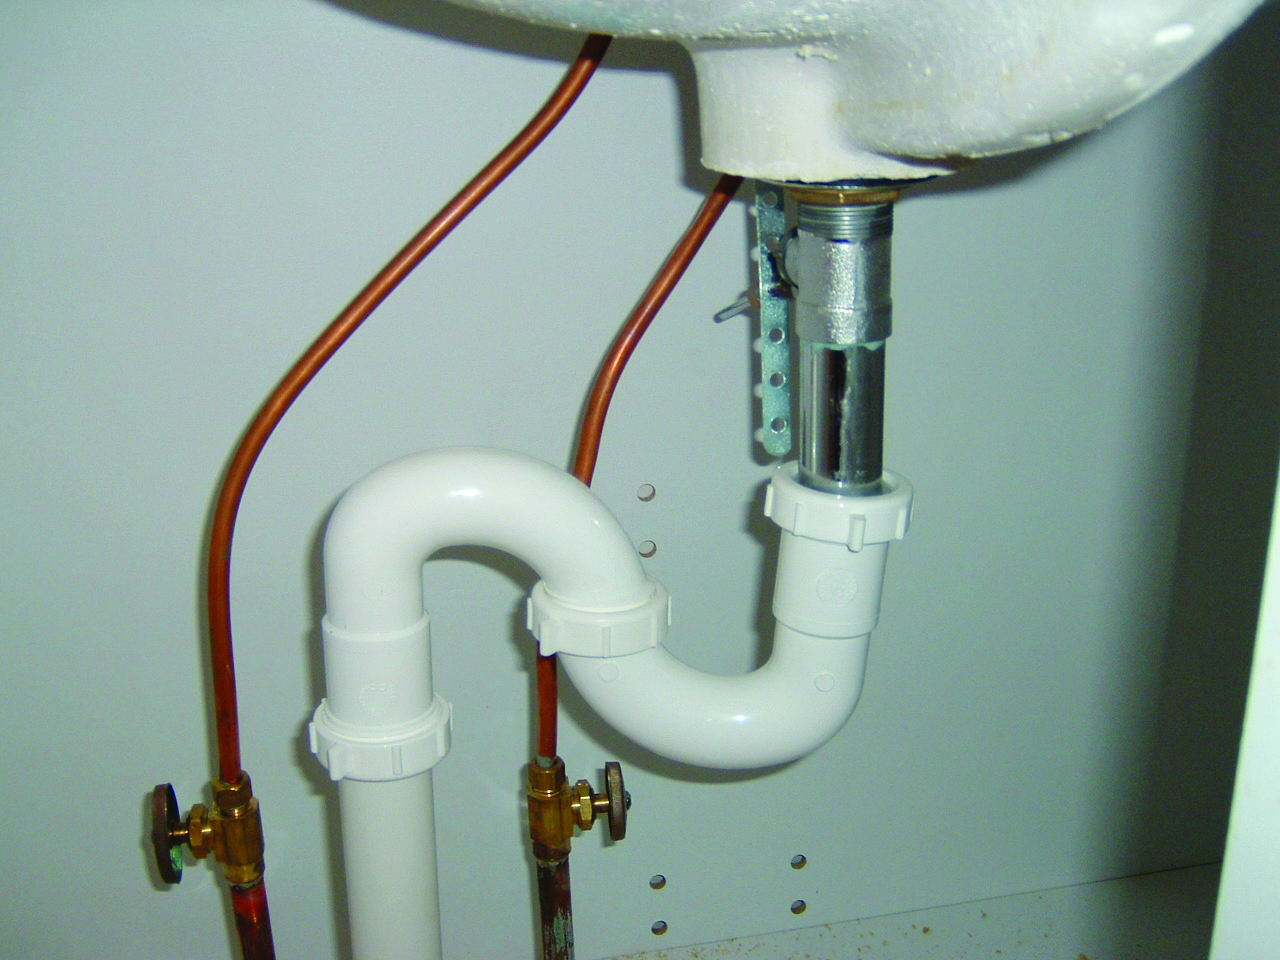
Each plumbing fixture in your house has a drain trap. This U-shaped pipe provides a water barrier that keeps sewer gases from entering the house. Because of its shape, traps are also the source of most clogging problems.
Drains are only for water and sewage.
- Do NOT pour cooking grease down a drain.
- Do NOT flush paper towels, sanitary products or diapers down the toilet.
Unclogging a sink
Boiling Water
Pour lots of boiling water into the drain. Boiling water can help dissolve grease, soap and other sticky things that can clog a drain. Take precautions not to burn yourself. Chemical drain openers rarely work on fully clogged sinks and are dangerous to use as they can splash up and burn you.

Plunger
If the boiling water doesn’t work, use a sink plunger. Cover any overflow openings. Be sure water is covering the rubber edges of the sink plunger. Plunge up and down 15 or 20 times rapidly. Lift the plunger to see if the clog has cleared.
Auger
If plunging doesn’t work, try a plumber’s snake (auger) or call a licensed plumber.
How to Clean a Sink Trap
If a plunger or auger does not unclog the sink, the clog may be in the drain trap.
- Be sure the water supply is off and then place a large bowl or bucket under the trap to catch any water that is in the pipes.
- Loosen the two large slip nuts (A and B) by turning them counterclockwise (you may need channel-lock pliers). Then unscrew the nuts and slide them away from their connections. Note the position of the washers (C).
- Gently pull out the trap and remove all the debris in the trap. Clean metal traps with a wire brush, plastic traps with a scrubbing brush and soapy water and replace the trap.
- Slide the slip nuts to the pipe threads, making sure each washer is in place, and tighten by turning the slip nuts clockwise.
- Turn on the water and check for leaks.
Unclogging the Toilet
- Shut off the water to the toilet using the shut-off valve. Plungers for toilets have a bell-shaped rubber end (usually black).
- Place the plunger in the toilet, covering the drain opening in the bowl and plunge up and down 15 or 20 times. Lift the plunger to see if the clog has cleared.
- You can unclog a toilet with a closet or hand auger. Unwind the auger through the toilet bowl until it will not go any further. Then rewind to see if you have retrieved a clogging item. If several attempts don’t clear the clog, call a licensed plumber.
Main Drain/Soil Line
The horizontal pipe running across your basement is the soil pipe (main drain line) for your house. If all of your sinks are draining very slowly or backing up, there could be a clog in this drain line. Contact a licensed plumber if this happens or if you notice leaks in this line.
Water Heater
Set your water heater thermostat as low as practical 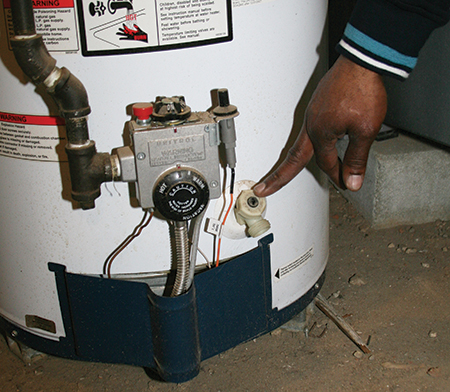
Thermostats
Thermostats are marked where they should be set for “normal” use. If you will be away for an extended period check for the vacation setting on your gas hot water heater and lower the thermostat to vacation setting.
Gas water heaters have one thermostat near the bottom of the tank on the outside. (See image to the right)
Electric water heaters have two thermostats— one at the top and one near the bottom, both usually behind metal doors.
SAFETY TIP! Hot water heater temperatures should be no more than 120 degrees for safety and to save money.
Twice a year drain some water from the water heater
Remove sediment from your water heater by draining several buckets of water. Turn the valve at the bottom of the water heater to do so. Be careful not to scald yourself. This improves the efficiency of the water heater, which saves you money.
Heating
Heating systems are run by gas, oil, or electricity. In the event of an emergency gas heaters have an emergency switch on or directly above the heater. Oil heaters should have an emergency switch located at the top of the basement steps.
Gas and oil systems should be serviced annually before the heating season by a licensed heating contractor.
Hot Water Systems
Heated water travels through pipes to radiators or baseboard convectors (baseboard “fin” radiators).
The water is returned to the boiler, either by gravity or by a circulator pump, to be heated again. Radiators and convectors work best when they are clean and not blocked by furniture or other items.
Air trapped inside a radiator or convector reduces heat transfer. If your radiators do not have automatic air valves, they may need to be “bled” manually.
Bleed the radiator if it is hot at the bottom but cold near the top. Bleeding means removing air so that water will fill the pipes and radiators.
How to Bleed a Radiator
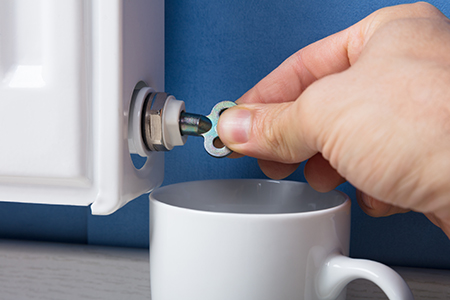
Some systems automatically fill with water when you open the bleed valve. If yours does not, you will need to add water manually. Turn the water-feed valve on (in the basement) before you begin to bleed the radiators.
- Use a radiator key (available from hardware stores) and start at the radiator nearest to the heater.
- Hold a small container under the bleed valve to catch any water.
- Insert the key into the bleed valve and turn counterclockwise until you hear air escaping.
- When water starts to come out of the valve, shut it off by turning the key clockwise.
- Move to the next radiator and continue until all radiators are filled with water.
- Immediately shut the water-feed valve off at the heater when you are finished.
Forced Hot Air Systems
Forced hot air systems heat the air, then use a blower (fan) to circulate the air through a system of ducts to each room in your house.
Keep all vents clear or the heater will not be able to send warm air throughout the house.
Clean or replace the air filter for your system once a month during the heating system
Note the size of the air filter (written on the side). The replacement air filter must be the same size. Replace the cover securely after putting the air filter back into the filter slot.
Gas Hot Air Heating System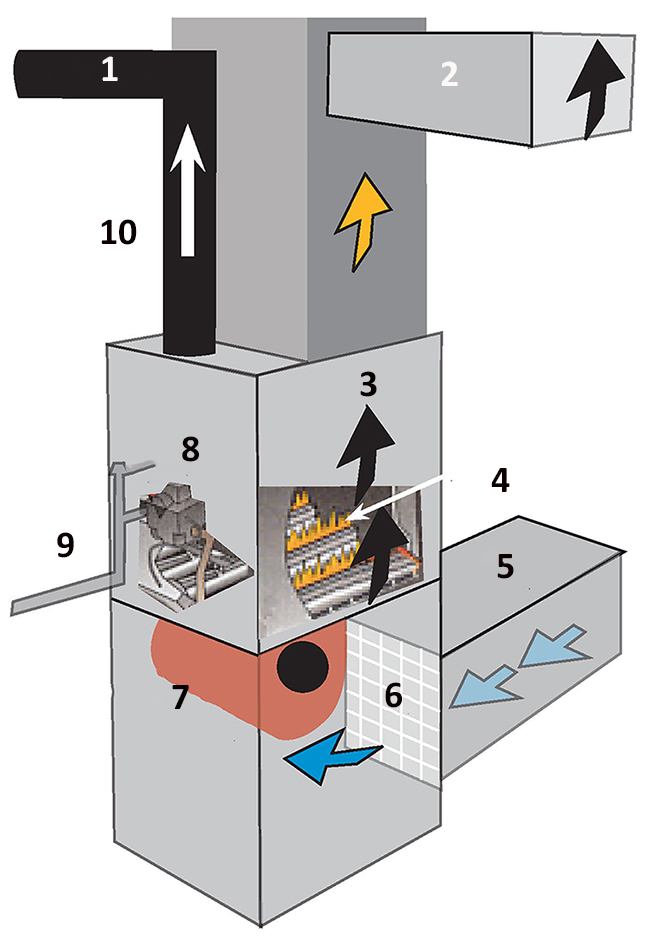
1. To Chimney
2. Hot Air Duct
3. Heat Exchnager
4. Burner Jets
5. Cold Air Return
6. Air Filter
7. Blower Motor with Fan/Circulator
8. Gas Valve
9. Gas Line
10. Flue Pipe
Thermostats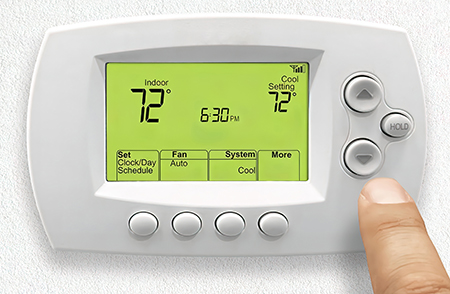
Thermostats are switches that turn your heater on and off, keeping the temperature in the house near the temperature you’ve chosen. Manual thermostats contain dials or levers that you move by hand to adjust the temperature in the house. Automatic or programmable thermostats can be set to change the house temperature several times a day.
If you have ceiling fans turn them counterclockwise during the summer to move the air downward. In the winter turn the fan clockwise to to allow the warmer air to move downward.
Electrical System
Know your electrical system
Electricity comes into your home through wires, passing through an electric meter that measures usage and into a main service panel of either circuit breakers or fuses. Electricity is carried from this panel throughout your house.
Each circuit breaker or fuse is a safety switch for an electrical circuit in the home. Each circuit can have one or more lights, receptacles or appliances on it. When too many items on the same circuit are drawing electricity at the same time, the safety switch will shut down to prevent overheated wires and even a fire.
Each circuit breaker panel or fuse box has a main disconnect or switch to shut off electricity to the entire house. Know where this is located. In case of an emergency, turn off the main disconnect switch for the circuit breakers or remove the main disconnect fuse block.
Circuit Breakers
 When a circuit breaker shuts down or “trips,” the switch moves from the “on” to the “off” position or sometimes to a middle position. Unplug the appliances and turn off any lights on that circuit. Move the switch all the way to “off” and then back to “on.”
If the circuit trips again immediately when you turn the lights or appliances back on, or won’t stay in the “on” position, contact a licensed electrician.
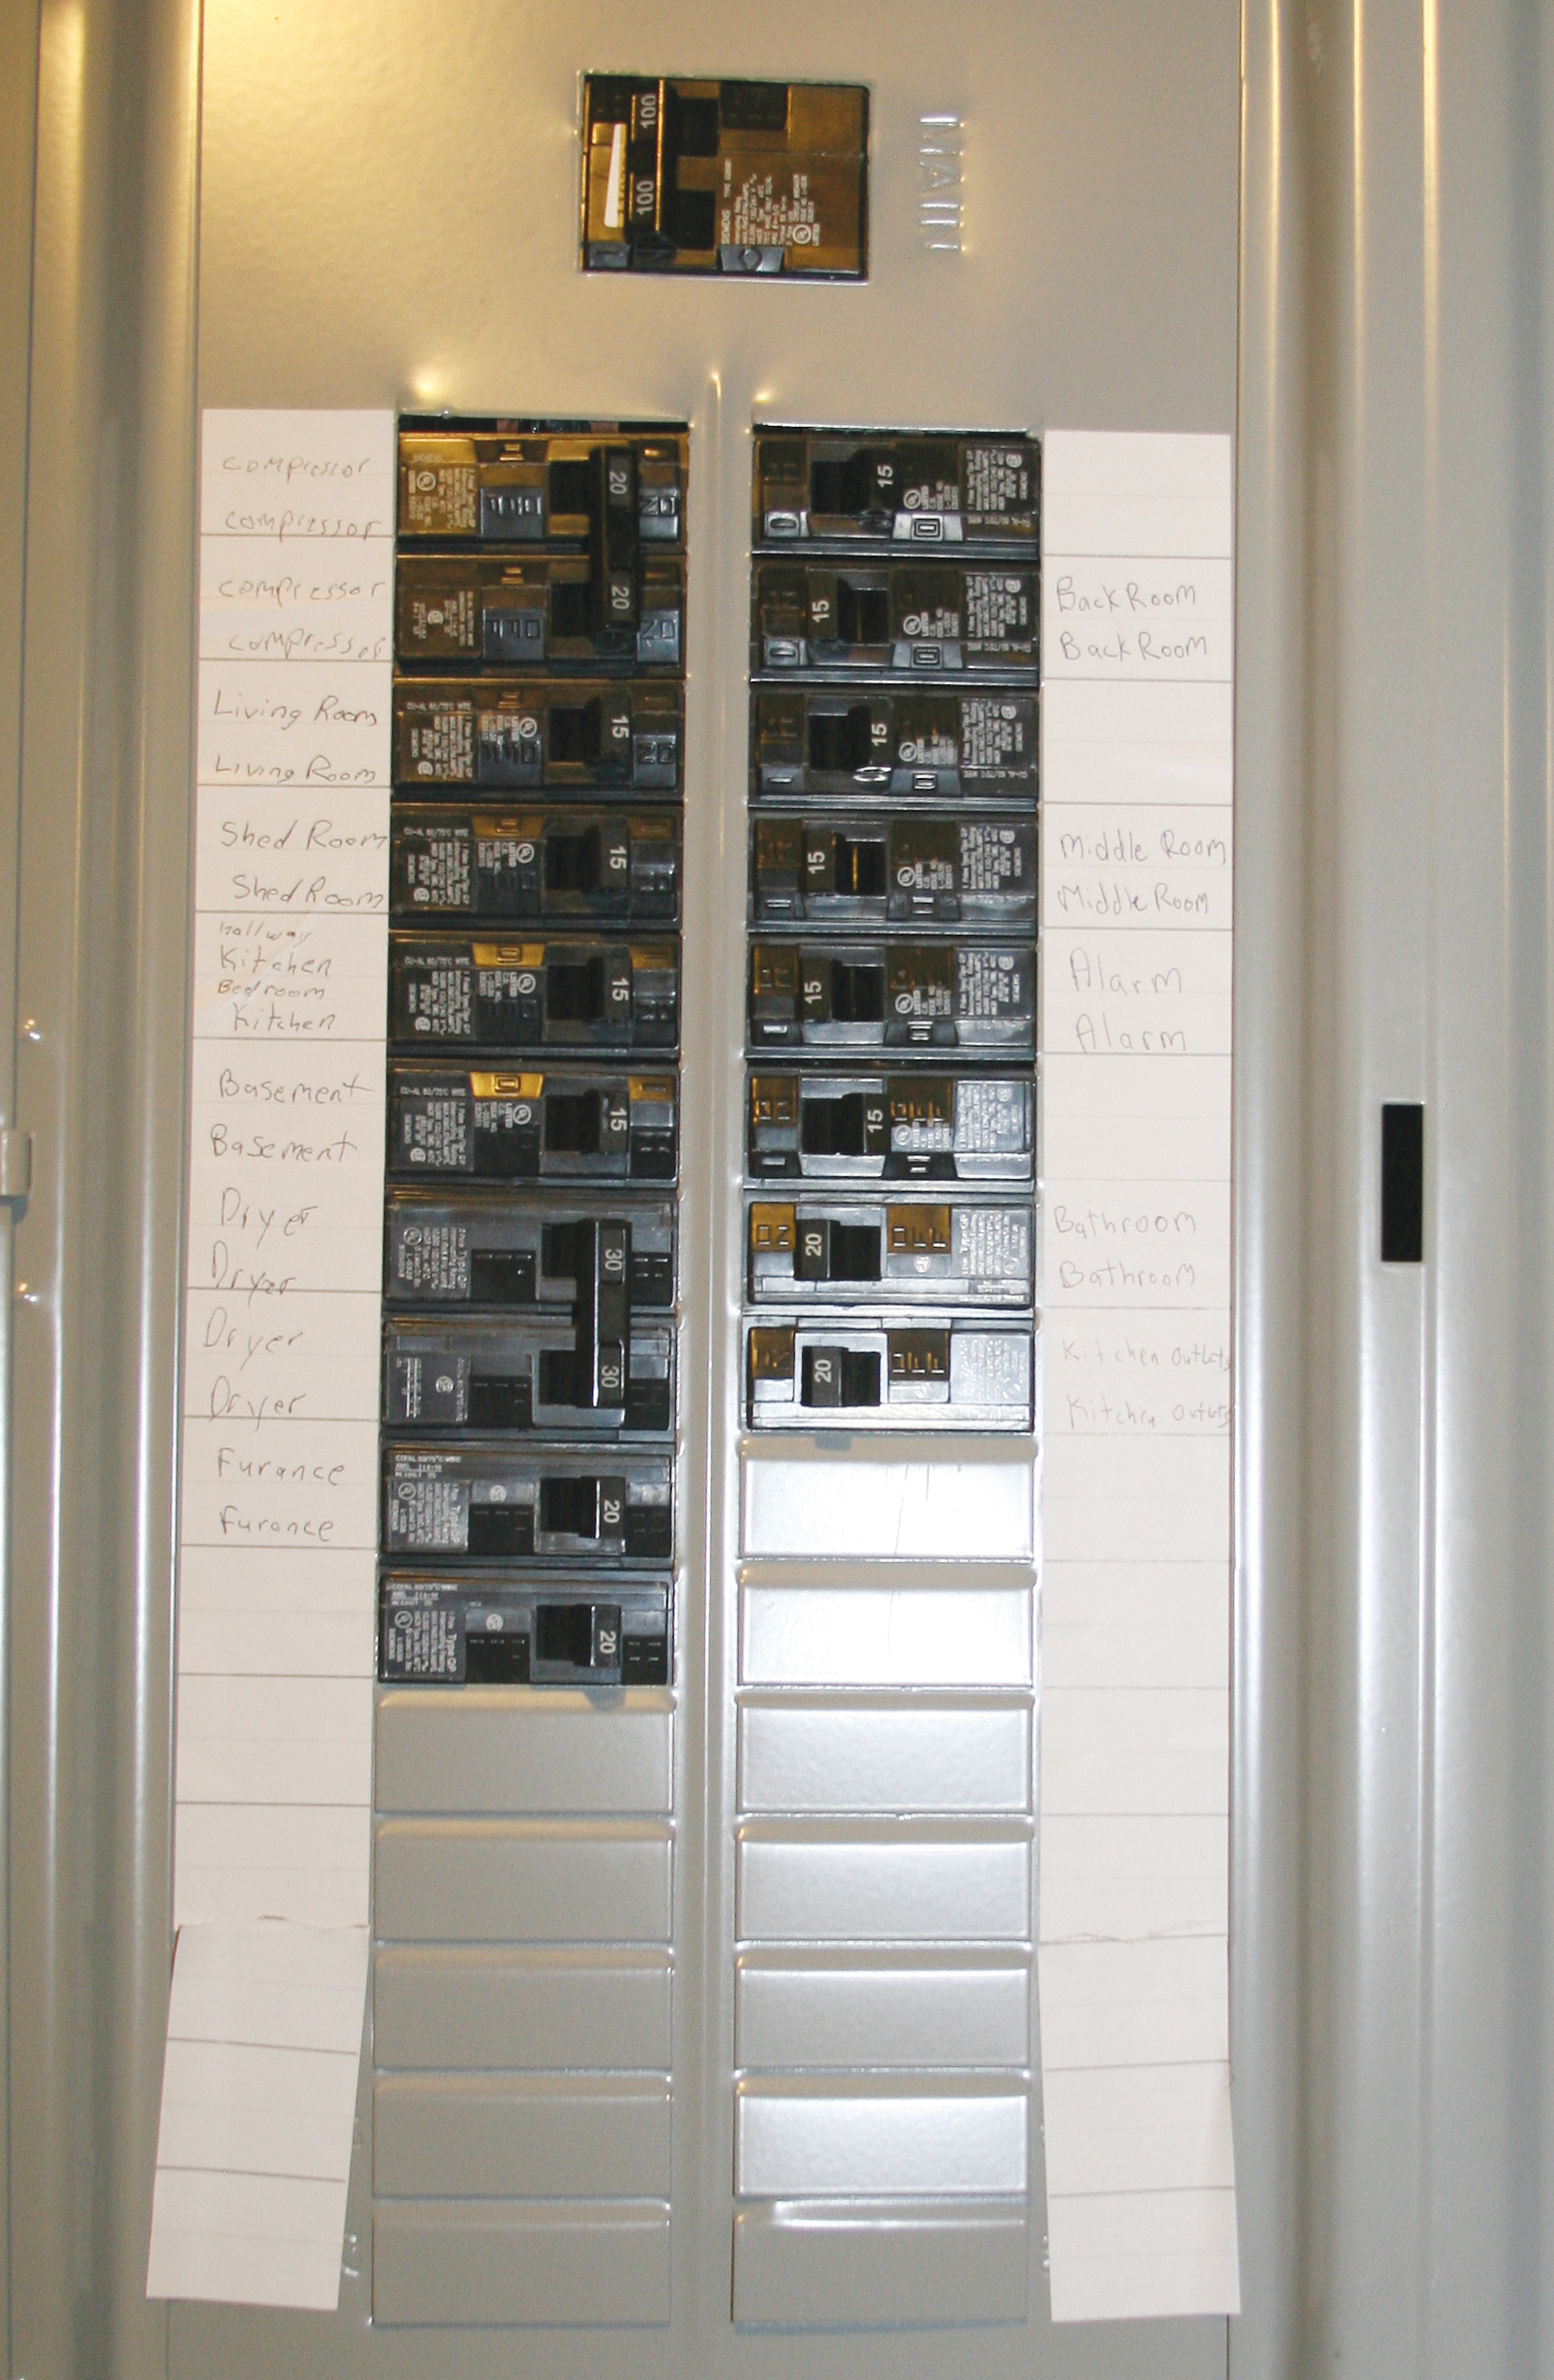
Label your circuit breaker panel
You’ll need a partner to assist with this. Turn on your lights and appliances. Move one switch to the off position and see which lights and/or appliances no longer work. Mark the space next to that breaker with the information. Move the switch back to the “on” position. Repeat this step until all breakers are labeled.
Fuse Boxes
 Fuse boxes can use two different types of fuses: “S” or “ST” fuses and “T” or “TL” fuses. There will also be an amperage rating on each fuse with a number like 15, 20 or 30. Always replace the fuse with the same letters and numbers, never with anything different. Keep a box of spare fuses and a flashlight by the fuse box so you can easily reach them if a fuse blows out.
Before replacing a blown fuse, unplug the panel appliances and turn off the lights that were on that circuit. If you replace a fuse and the new one blows out immediately when you turn the lights or appliances back on, contact a licensed electrician. Never put anything other than a fuse in a fuse socket!
Label Your Fuse Box
You will need a partner to assist with this. Turn on your lights and appliances. Remove one fuse from the box and see which lights and/or appliances no longer work. Mark the space next to that fuse with that information. Replace the fuse. Repeat this step until all fuses are labeled.
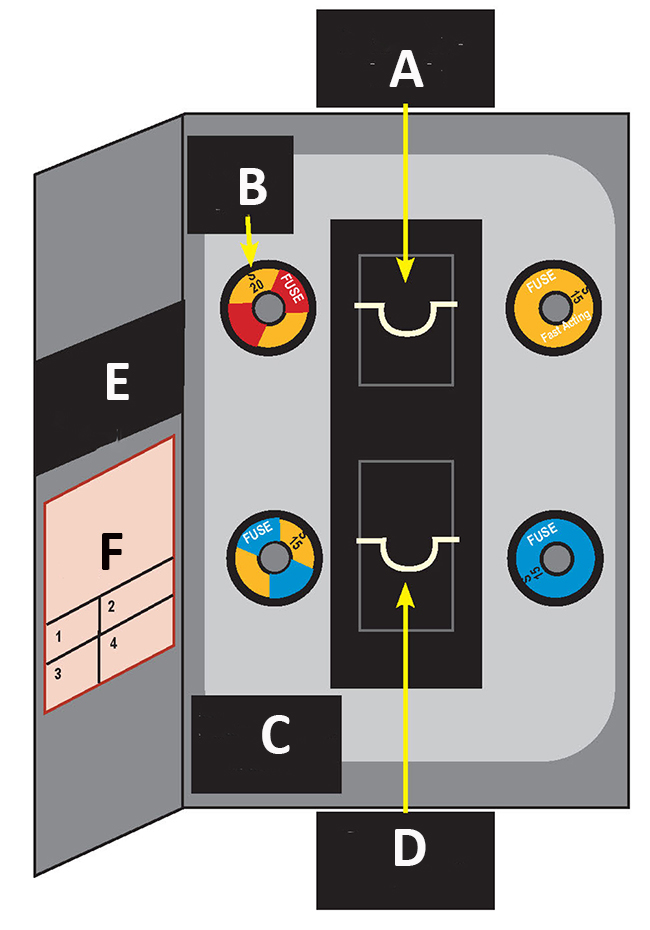
A. Main Fuse Block
B. Plug Fuse
C. Protective Cover
D. Appliance Fuse Block
E. Door Panel with Label
F. Index
Ground Fault Circuit Interrupters (GFCIs)
Ground Fault Circuit Interrupters (GFCIs) are safety devices that prevent shock or electrocution. GFCIs have two buttons: one marked “Test” and the other marked “Reset.” Push the “Test” button and the power to the outlet should cut off. Push the “Reset” button to turn the power back on. If it does not turn off, the outlet should not be used until it has been replaced by a licensed electrician. GFCIs are sensitive and can trip easily. If the power to the receptacle goes off, push the “reset” button to restore it.
When you plug a cord into an outlet make sure the plug is pushed all the way in. Loose connections can cause overheating. If the outlet seems loose it should be replaced by a licensed electrician. Use extension cords as little as possible. Where necessary, use the shortest cord possible.
- Do NOT use extension cords with heavy duty appliances, such as refrigerators.
- Do NOT run extension cords under carpeting or where they will be walked on.
Save Money with Good Maintenance
Weatherize your home
1. Caulk to air seal your home

- Use caulk to seal holes around window or door trim, pipes, exhaust vents, cable TV or telephone wires coming into the house or any small cracks in walls. Ask your hardware store attendant how to load and use a caulk gun and which caulk to buy.
2. Weatherstrip
- Apply weatherstripping to all your doors and windows.
3. Fix windows
- Close storm windows tightly in winter.
- Close primary windows tightly using a sash lock.
- Replace all broken and cracked window glass:
1. Remove broken glass, old putty and window points.
2. Measure size of glass needed. Purchase glass at hardware store and have it cut to size.
3. Place glass in window and replace the window points (they keep the window pane in place).
4. Glaze around edge of window pane to seal in place. Wait for glazing (a type of caulk) to dry before painting.
Look for appliances that use less energy
How to Read an Energy Guide Label
You will find this information on an Energy Guide Label:
1. Information about features.
2. Manufacturer, model number, capacity.
3. Estimates of annual energy use. The lower the number, the more energy efficient and the less it will cost to run.
4. Range of ratings for similar models from “uses least energy” to “uses most energy.” This scale shows how a particular model measures up to the competition.
5. An estimate of the yearly cost to run this model.
More Ways to Conserve Energy and Reduce Energy Bills
Save Money in Winter
BY TURNING YOUR THERMOSTAT DOWN
In cold weather, turn your thermostat down to between 52o and 62o when you are asleep or away from the house for extended periods, such as being at work all day. Install a programmable thermometer to do this automatically.
Save Money in Summer
BY TURNING YOUR THERMOSTAT UP
If you use air conditioning in hot weather, make the area comfortable, not cold. The colder you make it, the more it costs. Limit your use of the air conditioner. Install a programmable thermometer to do this automatically.
Save Money
SET YOUR WATER HEATER THERMOSTAT AS LOW AS PRACTICAL
Save Money and Electricity
Replace incandescent light bulbs with compact fluorescent light bulbs or light-emitting diode (LED) bulbs.
Turn off all lights and appliances when they are not in use.
Save Money and Water

IN THE SHOWER
Install a low-flow showerhead and take shorter showers (the number one use of heated water).
WATCH FOR DRIPS, RUNS AND LEAKS
Replace washers in dripping faucets.
If your toilet runs sometimes when no one flushes it, it is due to a water leak. Replace the mechanisms inside the toilet tank.
USE APPLIANCES WISELY
Run your washer and dishwasher only with full loads. Wash clothes in cold water.
Maintenance Schedules
Use the following lists to help you keep your home in working order:
MONTHLY
Smoke Alarms
- Test smoke alarms. If your smoke alarms have a removable battery, replace the battery in the smoke detector every six months (or sooner if the detector begins to warn of low battery). Smoke alarms in one- and two-family houses must be powered by the building’s primary electrical system or a non-removable (sealed) 10-year battery.
Air Filter – Furnace
- Check the air filter on your furnace and replace if necessary. Most air filters should be replaced every month in the heating season.
Plumbing Fixtures
- Check all drains, water supply lines, and faucets for leaks.
GFCI Receptacles
- Test GFCI receptacles by pressing the “Test” button and then “Reset.”
Refrigerators
- Clean around rubber gasket seal of the refrigerator and freezer doors.
Range Hood
- Clean the range hood filter.
REGULARLY
Dryer Lint Screen
- Clean dryer lint screen after each use.
Clean the House
- Regular vacuuming and cleaning reduces the spread of intruders – bugs, microbes, mold, and small pests, such as mice. All of these, especially in high concentrations, can be harmful to your health.
- Most older homes in Philadelphia have some lead paint. Dust from lead paint can be very harmful, especially to young children. Vacuuming the house will greatly reduce the hazard. For more information about lead safety in your home, visit the Philadelphia Department of Public Health’s Lead and Healthy
SPRING
- Exterior Walls – inspect for damage.
- Gutters and Downspouts – clean and patch.
- Porches, Steps and Railings – inspect for loose boards and/or nails. Resecure.
- Railings – inspect wrought iron railings for rust. Paint where needed.
- Roof – inspect for damage.
- Trees – trim trees and shrubs away from house. Remove any small trees that take root in or close to your walls and roof.
- Water Heater – drain sediment.
- Windows – vacuum windows (inside the window where the bottom sash meets the frame). Storm windows have weep holes at the bottom, near the window frame. Make sure these are clear so that rainwater will drain out rather than rot the window frame.
- Wood Trim – inspect. Paint where needed.
FALL
- Chimney – inspected by licensed professional.
- Dryers – clean lint out of dryer vent.
- Exterior Walls – inspect for dam
- Exterior Openings – caulk and patch.
- Gutters and Downspouts – clean and patch.
- Garden Hoses and Hose Bibs – drain and bring garden hose inside. Prepare hose bibs for winter.
- Heat Vents – vacuum to improve heat transfer.
- Heater – serviced by licensed professional.
- Radiators – bleed air/fill with water.
- Roof – inspect for damage.
- Water Heater – drain sediment.
- Weatherstripping – inspect and replace where necessary.